Offline first with progressive web apps [part 3/3]: background sync
This is the last blog of the series where we are making a website completely offline accessible through the means of a progressive web app (PWA). In the first blog, we started with explaining what are the benefits of a PWA and looked at how service workers fit into PWA. The second blog post was all about caching strategies and applying those to view our website without the need for a network connection. This part builds further on those two blogs.
I’m happy to share that this part will be a lot more code-driven than the last one and I will explain how everything works through code examples. But what are we building in the last part? We are making sure our form to add videos is working without a network connection. We can achieve this functionality with the use of IndexedDB and Background sync.
We will start by explaining IndexedDB and create a small framework around it so we can use it with promises. After that, we integrate IndexedDB into our app. Afterwards, we go over the explanation of Background sync and implement that one as well.
IndexedDB: What is it?
IndexedDB is a NoSQL database that completely runs inside the browser. Let’s go over some features that IndexedDB has:
- IndexedDB is transactional
- IndexedDB is an object store database
- IndexedDB has indexes for only fetching objects that match that index value (A bit like a WHERE clause in SQL)
- IndexedDB runs in the browser
- Multiple databases are allowed (Most of the times you will only use one)
- A database can have multiple object stores
- An object store is a key-value pair where the value can be almost anything JavaScript allows as a variable
- IndexedDB has the same-origin policy, so every website has different databases and your data will not get overridden
IndexedDB has one important pattern that almost always will be used:
Open a database → Start a transaction on an object store → Open up that object store → Perform actions on the object store (Add, Update, Delete, Get) → Close the transaction.
To get your environment ready to develop you can check out this git tag: PT3_Starting-Point. Then you can run the server and local web server as explained in part 1.
Small promise based IndexedDB framework
Because the API of IndexedDB works a lot with callbacks we will write a small framework around it to use it with promises. And while we are doing that we can as well learn how IndexedDB works on a code level.
To start our small framework create a new JavaScript file called promise-based-indexedDB.js in the js folder of the client.
The first method we will write is one to open the database.
const DB_VERSION = 1;
const DB_NAME = "vid-voter"

const openDB = () => {
    return new Promise((resolve, reject) => {
        if (!window.indexedDB) {
            reject("IndexedDB not supported");
        }

        const request = window.indexedDB.open(DB_NAME, DB_VERSION);

        request.onerror = (event) => {
            reject("DB error: " + event.target.error);
        };

        request.onupgradeneeded = (event) => {
            const db = event.target.result;

            if (!db.objectStoreNames.contains("votes")) {
                db.createObjectStore("votes", {keyPath: "id"});
            }
        };

        request.onsuccess = (event) => {
            resolve(event.target.result);
        };
    });
};
In this method, we first check if IndexedDB is available on the device. If it is not we reject the promise. Next up we open the database with a name and a version with the window.indexedDB.open method. Then we have 3 callbacks on error, on success, on upgrade needed. The on error triggers when there is an error. The on success triggers when the database is opened and we resolve the promise with the database object. The on upgrade needed gets triggered when the database is opened with a higher version. In this callback, you can execute scripts to create object stores. We created a new object store videos with the method on the database object createObjectStore.
Next up is the method to open up a transaction and an object-store. This is the only method that does not return a promise.
const openObjectStore = (db, name, transactionMode) => {
    return db.transaction(name, transactionMode).objectStore(name);
};
Nothing to fancy here we open up the transaction with the method transaction after that we open the object store with the objectStore method.
The following method we implement is to add an object to an object-store.
const addObject = (storeName, object) => {
    return new Promise((resolve, reject) => {
        openDB().then(db => {
            openObjectStore(db, storeName, "readwrite")
                .add(object)
                .onsuccess = resolve;
        }).catch(reason => reject(reason));
    });
};
First, we start with opening up the database, afterwards we open up the object store and call the add method on it. We use the on success callback to resolve the promise.
To update the methods we need to do some more work here is the code:
const updateObject = (storeName, id, object) => {
    return new Promise((resolve, reject) => {
        openDB().then(db => {
            openObjectStore(db, storeName, "readwrite")
                .openCursor().onsuccess = (event) => {
                const cursor = event.target.result;
                if (!cursor) {
                    reject(`No object store found for '${storeName}'`)
                }

                if (cursor.value.id === id) {
                    cursor.update(object).onsuccess = resolve;
                }

                cursor.continue();
            }
        }).catch(reason => reject(reason));
    });
};
We open up the database and the object store again. Then we use openCursor to start iteration over the elements in the object store. If there is no cursor we reject the promise with a nice message. But if there is a cursor we check if the cursor value id is the same as the id of the object we need to update. If this is the same we update the object with the updatemethod and resolve the promise with the onsuccess callback. If the id’s are not the same we call the continue() method on the cursor object. This method tells the cursor to go to the next object in the store.
The delete method is almost the same as the add method:
const deleteObject = (storeName, id) => {
    return new Promise((resolve, reject) => {
        openDB().then(db => {
            openObjectStore(db, storeName, "readwrite")
                .delete(id)
                .onsuccess = resolve;
        }).catch(reason => reject(reason));
    });
};
We start again with opening the database and the object store. Then on the object store we call the delete method and we use the onsuccess callback to resolve the promise.
The next method is not as generic as the other ones and is used to fetch the videos from IndexedDB but if there are no videos in the database or the database cannot be opened up. Then we still fetch the videos from the server. Check out the following code:
const getVideos = () => {
    return new Promise(resolve => {
        openDB().then(db => {
            const store = openObjectStore(db, "videos", "readwrite");
            const videos = [];
            store.openCursor().onsuccess = (event) => {
                const cursor = event.target.result;
                if (cursor) {
                    videos.push(cursor.value);
                    cursor.continue();
                } else {
                    if (videos.length > 0) {
                        resolve(videos);
                    } else {
                        getVideosFromServer().then((videos) => {
                            for (const video of videos) {
                                addObject("videos", video);
                            }
                            resolve(videos);
                        });
                    }
                }
            }
        }).catch(function() {
            getVideosFromServer().then((videos) => {
                resolve(videos);
            });
        });
    });
};

const getVideosFromServer = () => {
    return new Promise((resolve) => $.getJSON("http://localhost:3000/videos", resolve));
};
When we are able to open up the object store and we have a cursor we iterate over all videos. Every iteration we come back in the same callback and the iteration is done when there is no cursor. If the videos array as a length bigger than zero we return the results from IndexedDB. If we do not have any results we will check the server for all the videos. When the server returns the videos we store them as well inside the object store to keep browser and server in sync.
It is important that when you create new objects, you create them in IndexedDB and on the server side
– Wout Schoovaerts
All this code can be found under the git tag: PT3_1-indexedDB-promises.
Render videos from IndexedDB
Currently we still render the videos we get back from the server. But as we saw in the getVideos method we store all videos we get from the server in IndexedDB. So let’s use this and render the videos from there.
First of all we need to add a script tag to include our small framework. Add the following in voter.html above the voter.js script tag.
<script src="js/promise-based-indexedDB.js"></script>The following code change is to render the videos from IndexedDB. This change needs to happpen inside voter.js.
Replace loadVideoList with the following:
const loadVideoList = () => {
    getVideos().then(renderVideos);
};
Instead of fetching it from the server we just use the method from our IndexedDB framework.
Add a video
In the current code we add a video with an AJAX call to the server. We still need to do this but if we want our website to work without an internet connection we also need to add it to an IndexedDB object store. So lets do this.
Replace addVideo with the following
const addVideo = () => {
const titleInput = $("#title");
const urlInput = $("#url");
const postData = {
id: Date.now().toString().substring(3, 11),
title: titleInput.val(),
link: urlInput.val(),
points: 0
};
titleInput.val('');
urlInput.val('');
// Add video to the object store
addObject("videos", postData)
.catch(e => console.error(e));
$.ajax({
type: 'POST',
url: 'http://localhost:3000/videos',
data: JSON.stringify(postData),
success: renderVideos,
contentType: 'application/json',
dataType: 'json'
});
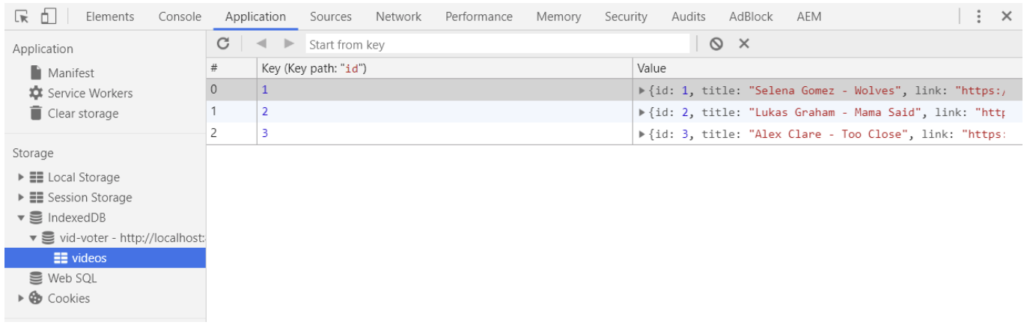
};Now if you add a video this will also we added to the object store. To view the object store you can go to Chrome Developer Tools → Select Application → Open IndexedDB → Open vid-voter. And there you can see your stores.
Our ultimate goal is to utilize Background Sync and in order to do this we need to use our small IndexedDB framework on our web page and in the service worker. But they have different scopes. A service worker does not have a window object. This is what we are currently using. In order to make our code work for our service worker we need to change every window**.indexedDB** to self**.indexedDB**.
We also need to update the method getVideosFromServer to the following:
const getVideosFromServer = () => {
    return new Promise((resolve) => {
            if (self.$) {
                $.getJSON("http://localhost:3000/videos", resolve)
            } else if (self.fetch) {
                fetch("http://localhost:3000/videos").then((response) => {
                    return response.json();
                }).then(function (videos) {
                    resolve(videos);
                });
            }
        }
    );
};
We check if we can use jQuery or the fetch api. Now we are ready to start implementing background sync.
All this code can be found under the git tag: PT3_2-use-indexedDB.
Background Sync
It can be really frustrating to fill in a long form and then getting a message that the form submit has failed because you lost connection or the server is down and you need to try later. If you are a bit like me you don’t want to fill in the same form twice. That’s where Background Sync comes into play.
If Background Sync is enabled the user will not see any difference then a website that has always a connection. But it really shines in retrying your form submit if it failed. Even without the user noticing it, the user does not need to be on the website anymore. Background Sync will work in the background as long as the browser is installed.
Support for Background Sync is quite bad at the moment of writing this blog, but it’s improving.

You can always check the latest status over here: Can I use…
Now we know what Background Sync does we can start implementing it in our application
Adding Background Sync to our app
The first method we need to change is addVideo in voter.js. This is how the function now looks:
const addVideo = () => {
    const titleInput = $("#title");
    const urlInput = $("#url");
    const postData = {
        id: +Date.now().toString().substring(3, 11),
        title: titleInput.val(),
        link: urlInput.val(),
        points: 0,
        status: "sending"
    };

    titleInput.val('');
    urlInput.val('');

    // Add video to the object store
    addObject("videos", postData)
        .catch(e => console.error(e));

    if ("serviceWorker" in navigator && "SyncManager" in window) {
        navigator.serviceWorker.ready.then(function(registration) {
            registration.sync.register("sync-videos");
        });
    } else {
        $.ajax({
            type: 'POST',
            url: 'http://localhost:3000/videos',
            data: JSON.stringify(postData),
            success: renderVideos,
            contentType: 'application/json',
            dataType: 'json'
        });
    }
The change lies in the if statement. In this statement we check if we have a service worker and that we have a Sync Manager. If we have both then we register a new sync event called sync-videos. If we do not have both objects we call the server directly like we are used to.
We also added a status field to the post data. We will use this field to check if we need to try and resend this or not.
In promise-based-indexedDB.js we also need to change request.onupgradeneeded to the following:
request.onupgradeneeded = (event) => {
    const db = event.target.result;
    const upgradeTransaction = event.target.transaction;
    let videoStore;

    if (!db.objectStoreNames.contains("videos")) {
        videoStore = db.createObjectStore("videos", {keyPath: "id"});
    } else {
        videoStore = upgradeTransaction.objectStore("videos");
    }

    if (!videoStore.indexNames.contains("idx_status")) {
        videoStore.createIndex("idx_status", "status", { unique: false });
    }

};
In this piece of code we put an index on the status field so we can use this in our queries.
Do not forget to increase your DB_VERSION variable!
– Wout Schooaerts
Now that we have created that index we can use it, change getVideos to the following
const getVideos = (indexName, indexValue) => {
    return new Promise(resolve => {
        openDB().then(db => {
            const store = openObjectStore(db, "videos", "readwrite");
            const videos = [];

            const openCursor = indexName && indexValue ?
                store.index(indexName).openCursor(indexValue) :
                store.openCursor();

            openCursor.openCursor().onsuccess = (event) => {
                const cursor = event.target.result;
                if (cursor) {
                    videos.push(cursor.value);
                    cursor.continue();
                } else {
                    if (videos.length > 0) {
                        resolve(videos);
                    } else {
                        getVideosFromServer().then((videos) => {
                            for (const video of videos) {
                                addObject("videos", video);
                            }
                            resolve(videos);
                        });
                    }
                }
            }
        }).catch(function (e) {
            console.error(e);
            getVideosFromServer().then((videos) => {
                resolve(videos);
            });
        });
    });
};
We added 2 optional parameters to the getVideos method. If we set both of those we will create a cursor with that index and index value. This makes sure we if we send for example getVideos(‘status’, ‘sending’) that we only select those videos with a status of sending.
Now for the actual syncing add the following code in service-worker.jsbelow the method self**.addEventListener(“activate”, function (event) {})**:
self.addEventListener("sync", function(event) {
    if (event.tag === "sync-videos") {
        event.waitUntil(syncVideos());
    }
});
In this snippet we add a new event listener for sync then we check the if the event tag is the same that we use to trigger the sync event. If this is the same we try to sync the videos. Notice the event.waiteUntil, we use this so our sync process can not be interrupted.
The last piece of code we need to add is the syncVideos method. You can add the method at the end of the service-worker.js file:
const syncVideos = () => {
    return getVideos("idx_status", "sending").then((videos) => {
        return Promise.all(videos.map((video) => {
                return syncVideo(video)
                    .then((newVideo) => updateObject("videos", newVideo.id, newVideo));
            })
        );
    });
};

const syncVideo = (video) => {
    return fetch('http://localhost:3000/videos', {
        method: 'post',
        body: JSON.stringify(video)
    }).then(function (response) {
        return response.json();
    })
};
First we start with getting all videos with the status of sending. For all these videos we send a post request to create it on server side and update the object store value with the value that we got back from the server. In our case this has a updated status so it will not be synced again.
Now our application has background sync and the user will never see a message anymore that the form was not able to send if the browser supports Background Sync.COFFEE?
Our recent blog posts
See all blogs-
How is AI’s synthetic data enhancing User Experience Research? Technology

-
Web3.AI Rising : How new technology can add value to your business

-
How generative AI helped us create an e-commerce app – with personalised content – in just 2 weeks Technology

-
Can you build a foodie app in 3 days using Generative AI? (Spoiler alert: yes!)